|
| |
Every car I ever owned had nitrous kit on it.
I love my nitrous. Here I will try to
write as detailed as possible
instructions on how to install Zex Nitrous Kit
#82011 on Grand Prix GTP. Hopefully this will
give you an idea in what's involved in install. |
| |
*Note: Could be out of date. This was written
back in 2000 while installing it on my 1999
Grand Prix.
|
|
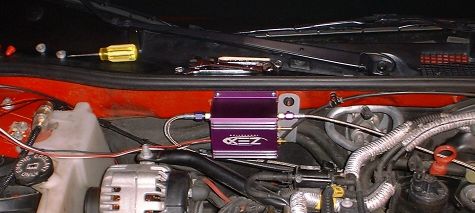
Step 1 |
My First step was
to find place for ZEX Control Box. Some people
place it under their K&N open cone setup, others
in front of their SLP cold air intake box, and
some on side of their CAI box. Since I have
Thrasher CAI which takes a lot of room under
hood I had to find a different place. When
finding place for your box please not the length
of provided SS N2O line, its only 15' and GP is
big car, keep that in mind. Also nozzle feed
line is only 6' so your box can't be far away
from your TB. I placed my box behind STB on
firewall, but to get it there you need to remove
engine hoist bracket, which you don't need until
you want to pull your engine out. Use 13mm
wrench for two bolts holding the bracket. This
will also allow you to change spark plugs very
fast. Don't drill anything yet go to Step 2 |
| |
 |
| |
|
|
Step 2 |
Now before bolting
on your ZEX Box you want to make sure your N2O
line is long enough. So place one end of line
where your box will be plus give it some
breathing space and run it down the firewall
next to fuel lines, continue running the line
under car next to fuel lines (use zip ties)...
You will have to improvise after you get to gas
tank, just place the line away from movable
parts, don't let it hang and make sure its
protected by other car parts... |
| |
 |
| |
|
|
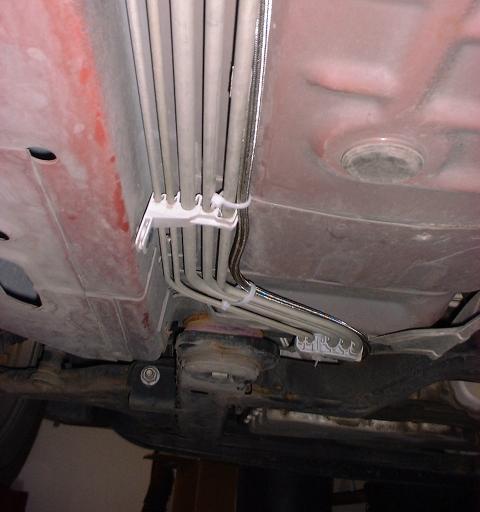
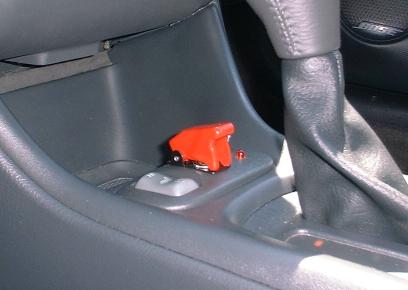
Step 3 |
How do you get
line in your trunk? Well first decide where you
want to place your bottle, some people place it
where their spare tire is and have spare tire
fly around their truck. I placed it on left
side of my truck so it doesn't interfere with my
stereo setup. Note: If you place your ZEX box
under cone line will not be long enough for you
to place it where I placed mine. After you make
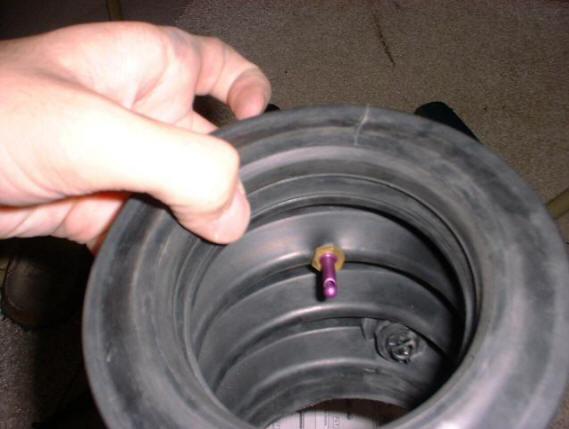
your decision its time to drill a hole in your
trunk. You need to drill a 3/4" hole, place a
grommet, and run your line through it. If line
is long enough you go to step 4 other wise
rethink your box location, your bottle location
and your line route. Note: Grommet not in
picture just some electrical tape... :) |
| |
 |
| |
|
|
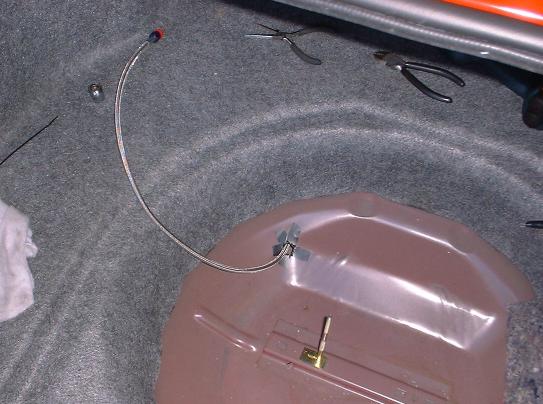
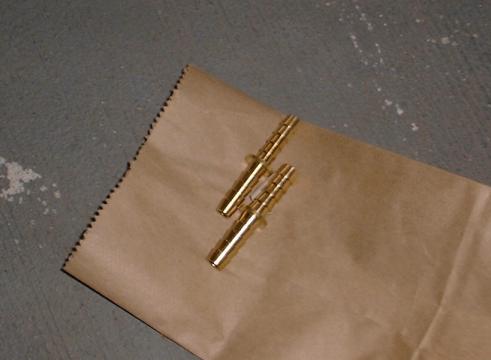
Step 4 |
You could install
your bottle at this point or Zex Control Box, I
decided with box since I wanted to get
everything under hood done first. My next step
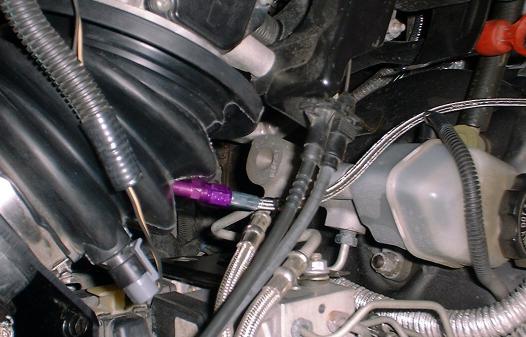
was to install vacuum lines. First you remove T
tap from fuel pressure regulator, place a
fitting (not provided, smallest size you can get
see picture bellow), and attach one of the
provided hoses on the fitting. Next step is to
install fuel jet on Zex box by selecting one of
the provided jets and attaching it to "intake"
fitting. They also provided clamps but i had no
need for them since it was so hard to get it on,
i don't think a little pressure will pop it
off. next step is to attach other hose to Zex
Box "regulator" and attach other end to fuel
pressure regulator where T tap use to be.
Provided hoses where long enough for my setup
but if you install your box under K&N or
somewhere else they wont be long enough and you
will have to buy new once. (see Feb. 04/2002
note below) |
| |
 |
| |
 |
| |
 |
| |
|
|
Step 5 |
Next we install
N2O nozzle, first assemble it with jet you
like. Then decide where you going to place it.
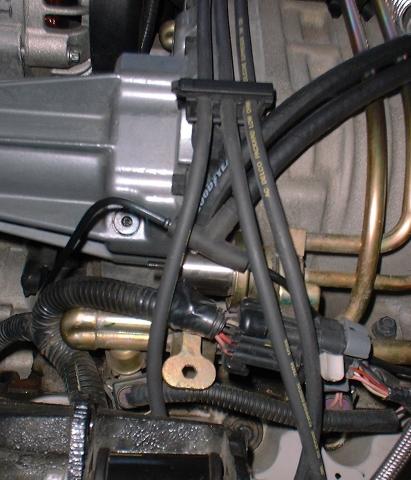
At first I put mine in rubber intake, drilled a hole and
placed it so it faces TB. I used my own screws
to hold jet in place and not provided once. You
can also get custom made TB spacers that you
insert between your SC and TB, drill a hole in
it and insert nozzle in it. This turned out to be a be a
bad place for jet, it didn't like it
much, since then I moved jet closer to TB (its
touching it now) and it worked better.
Spraying at location
is OK and will work. But some
of that nitrous will hit your MAF sensor and
will make it read off, or will make it read
inconsistent, and it will confuse your PCM. So
my solution was to build my own TB to SC spacer
out of
3/4" thick Polypropylene plastic,
same as my alcohol injection spacer. I purchased
GM TB gasket and cut out plastic in same shape.
It also required longer M6 bolts(55mmx1mm) to
replace short stock bolts that were holding TB
to SC. This worked like charm and I used
it for as long as I had nitrous on my car.
If you want to make same thing contact me and I
can get you some plastic cheap. |
| |
 |
| |
 |
| |
|
|
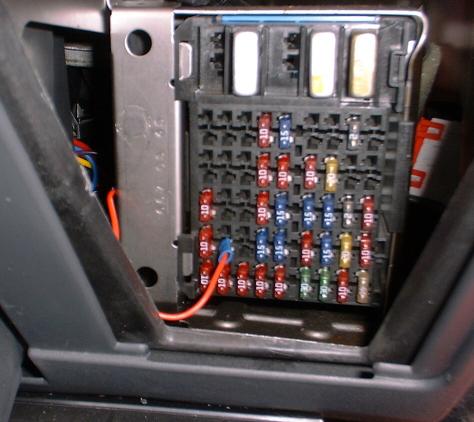
Step 6 |
Wiring is next, make sure you measure voltage of
everything with digital voltmeter before
installing it. Black wire goes to ground (ofcourse)
I got mine off STB bolts.
Red wire goes through firewall (grommet) and
connects to a big red switch that you get from
ZEX, you will need some extra wire to reach
inside of car. Switch requires 12v at 15A, I
found my source in fuse box (glove box), there
was unused space with 20A(see picture).
White wire connects to your TPS middle wire,
this is what triggers nitrous. Follow ZEX
instructions on how to program your TPS trigger.
|
| |
 |
| |
 |
| |
|
|
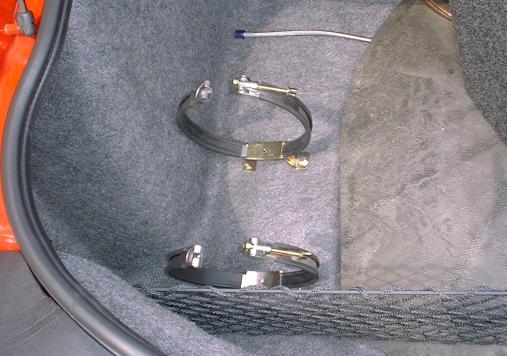
Step 7 |
Bottle Install... What I thought would be
easiest thing to do turned out to be hardest and
longest. My selected place for bottle was a bad
one, it turns out car chassis goes right under
my bottle place and my muffler is in the way of
me reaching the bolts under car. But that
didn't stop me, I placed my bottle brackets so I
don't drill into my cars frame, first hole was
easy, second one was a bitch, I was drilling
into my frame, and ended up braking my drill bit
at 9:00pm when all stores are closed. I just
took a smaller bit and continued drilling all
holes (I had to expand them a little). Placed
the screws and didn't bother going under car
since the bolts them self were holding pretty
good.. Also going through trunk carpet isn't
easy... |
| |
 |
| |
 |
| |
|
|
Step 8 |
Now its time to
try out if everything works. Open the bottle
up, make sure you don't have any N2O leaks (you
will hear it if there is a leak), put your car
in ON position, flip the N2O switch, and press
down on gas at this point you should hear air
spraying in TB, and then N20... That means N2O
is being delivered, now just find some open
stretch of road and floor it and see what
happens. Monitor Air/Fuel ration very closely,
if it gets under 0.89 volts shut it off and try
bigger fuel jet. Also a very important thing to
have with N2O system is AutoLite 103 spark plugs
gapped at 0.45 (or less, I have mine at .42)
otherwise you will have a lot of hesitation,
misfires and your car will feel like shit when
running N2O.
|
| |
|
Updates /
Comments |
August 27,
2001
After having this kit on my car for a while I
finally got it to work fine. I had a lot of
fuel pressure problems (if you have aftermarket
fuel pressure regulator adjust it with car on
and WOT not by removing vacuum lines and other
adjustment methods) but now everything works
fine... I also had to buy new aftermarket plug
wires, stock wires were gone... I also added
pressure gauge to monitor pressure of bottle
which should be over 800psi for best
performance, and bottle heater to keep it above
800psi... New personal best of 12.883@106.1 was
achieved with 75hp shot (keep in mind that was
without heads, headers and cam)...
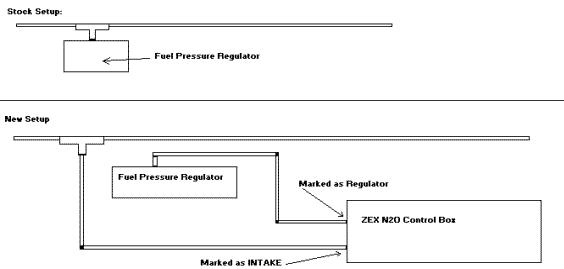
February 04,
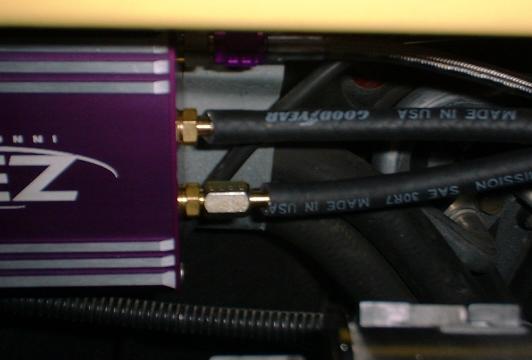
2001
I got lots of emails from people asking how
exactly do those vacuum lines connect to fuel
pressure regulator and ZEX Box... so I m
including a picture that will hopefully answer
your question...
I believe that
covers it, for any more information don't
hesitate to email me at
gtppower@hotmail.com
Osman |
| |
|
|
|
|
